Baked Lemon Shrimp Over Kale and Spaghetti Squash

So, there were tornado warnings in my area today… what am I supposed to do with that? I’m from Minnesota, where there honestly are tornado warnings… ALMOST every summer… I think… The thing that’s different is that in Minnesota, we had basements. Some basements are FULLY underground cement basements with little to no windows. Those felt safe when something like a tornado warning came up. Here, um…. downstairs bathroom? I was all like: “Ok kids, get in the bathtub… I am now going to cover you like you’re in a FORT with the couch cushions!”. Yeah. I’m weird. They loved it though! Hahaha! After the warning had lifted and we could come out of the bathroom, they begged to stay in the “FORT”. So, happily to say, nothing happened and all was good! 🙂

After the drama, I needed to get dinner together! I was craving pasta, so what’s a good alternative?! SPAGHETTI SQUASH! Why not throw in some shrimp and kale to make it extra delicious?!

So, this could be called shrimp scampi, it could be shrimp over lemon spaghetti squash… all sorts of things… So I just went with a descriptive title. Then you know what you’re getting!

wp-1454550270830.jpg

INGREDIENTS
  • 1 Medium spaghetti squash
  • 1½ lbs shrimp, peeled, deveined and tails still on (Trust me, get it peeled and deveined… it took my husband an HOUR to clean, peel and de-vein these stupid shrimp!)
MARINADE FOR THE SHRIMP:
  • 2 Tbsp unsalted butter, melted
  • Zest of one large lemon
  • juice of 1 lemon
  • 1 tsp minced garlic
  • 1 onion diced
  • 2 cups chopped kale
  • 1 tsp sea salt
  • ½ tsp fresh ground black pepper
  • 2 TB balsamic vinegar
  • 2 TB grated parmesan cheese
  • 3 TB shredded parmesan cheese
  • 2 TB olive oil
INSTRUCTIONS:
First, you MUST get the squash going in the oven!
  1. Preheat oven to 400 Degrees F
  2. Cut the squash in half lengthwise, scoop out seeds. Drizzle with olive oil and sprinkle with salt and pepper. Place face down in a small glass baking dish. Bake 30-40 min or until the tops of the squash indent when you press on them. Remove from the oven, immediately remove the squash from the pan and separate out the squash with a fork and place in a bowl. Mix in 1/4 cup of the SHREDDED parmesan cheese. (If this is done before the shrimp, cover the bowl with tin foil.)
Make the marinade:
  1. Place the shrimp in a large bowl.
  2. In a medium bowl whisk together the melted butter, lemon zest and juice, garlic, onion, lemon juice, lemon zest, salt, pepper, balsamic vinegar and parmesan cheese. Pour the marinade over the shrimp and let sit for 20 min if possible. I personally did not have time, and put it straight into the oven! 🙂
  3. Bake the shrimp at 400 degrees F for 12 minutes (or until cooked through an no longer translucent)
MAKE
  1. Quick saute the kale (if you choose to add it) in 2 TB butter and some chopped onions… only takes about 5-8 minutes. Make sure you wash it first, and chop it into bite size pieces and REMOVE the center “vein” of the stems. Add the kale to the bowl with the spaghetti squash/cheese mixture.
  2.  Remove the shrimp from the oven and put the shrimp on top of the spaghetti squash/kale mixture and sprinkle with grated parmesan and black pepper and serve IMMEDIATELY!

And….:
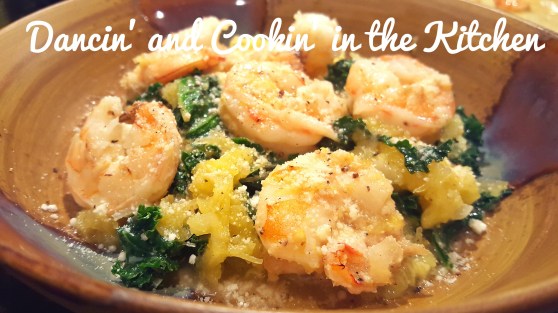
wp-1454550273654.jpg

This seriously has SO MUCH FLAVOR!!!!!

LOVE LOVE LOVE LOVE!

I am actually looking forward to eating the leftovers tomorrow!! YUM!

And now, for the SONG OF THE DAY! 🙂

It’s a song by Nicole Nordeman that always does a great job of reminding me what my Savior did for me!

Low Carb Chicken Nacho Bake

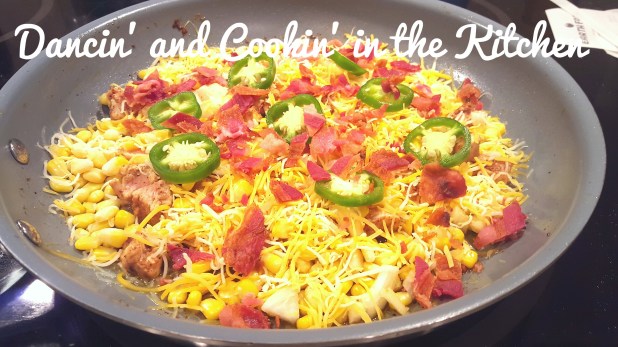
wp-1454463007513.jpg

It’s January… we are all still working on our New Year’s Resolutions I’m sure. I am continuing mine! The hubby and I are planning an anniversary cruise in the fall, and I do NOT want to be embarrassed when I put on that bathing suit. So… toning up, working out, and CLEAN eating is to be had! A lot of gluten free, low carb (except weekends), less eating out etc etc etc. You know the drill.

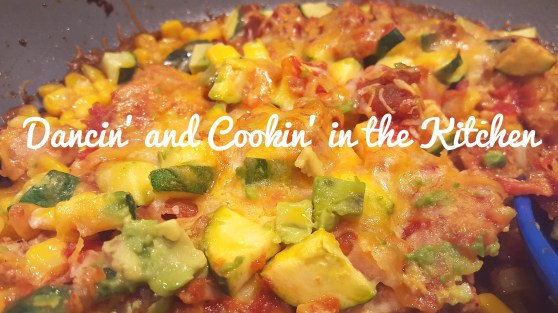
This recipe… mmmmmm!!!!!!!!!! DE-LISH! It’s filling, and takes care of that craving for nachos, and junk food… while being filling and full of protein and good fats! It’s a little bit on the “cheat” side with the bacon… but don’t skip it! It adds that perfect flavor!

wp-1454463014812.jpg

INGREDIENTS
  • 3 frozen chicken breasts (I used Trader Joes… my FAVORITE!)
  • 1½ cups cheddar cheese
  • salt and pepper to taste
  • 1/2 teaspoon smoked paprika
  • 1 teaspoon chili powder
  • 1/2 teaspoon cumin
  • ½ teaspoon cayenne pepper
  • OPTIONAL red pepper flakes
  • 1/2 tsp garlic powder
  • 1/2 tsp onion powder
  • 1/2 half small onion diced
  • 1 TB olive oil
  • 1 TB butter (for extra flavor, but NOT necessary)
  • 1 large jalapeno,
  • 3/4 cup frozen corn
  • 1 avocado
  • 1 small zucchini
  • 1/2 cup of your favorite salsa
  • 3 slices of bacon, cooked and crumbled

wp-1454463034724.jpg

INSTRUCTIONS
  1. Preparation: Heat oven to 425 degrees
  2. If you haven’t, microwave/cook your bacon and cut/crumble into pieces
  3. Combine and mix together salt, pepper, paprika, chili powder, onion powder, garlic powder, cumin and cayenne pepper in a bowl. Sprinkle and rub spice mixture over chicken pieces. Drizzle on olive oil on top of seasoned chicken and rub pieces together to evenly distribute oil. Melt the TB of butter in a large OVEN SAFE skillet on medium/medium high. Once melted, BROWN the chicken on both sides to really get those spices into the chicken. (DON’T cook through, just cook until brown on both sides… 2-3 minutes per side)
  4. Remove the chicken from the pan and turn off the stove top. Cut the chicken into bite size (about 1″x 1″) pieces and return to the pan.
  5. Add the rest of the ingredients (BUT NOT THE AVOCADO!! That’s put on after it comes out of the oven!!) on top of the chicken in the skillet and place into the oven. Make sure that the salsa is poured over everything in the skillet to give it a bit of liquid to cook in. (MAKE SURE YOUR PAN IS OVEN SAFE!! You can also bake it in a baking sheet… I just didn’t want to dirty 2 dishes.)
  6. Bake at 425 degrees F for 10-15 minutes or until hot, bubbly and delicious smelling (and the chicken pieces are cooked through).
  7. Remove from oven sprinkle avocado over top and serve immediately.
    *Optional: Serve with sour cream and chips!

And that’s it!!!

ENJOY!


And now, again, instead of a quote, I’m going to share ANOTHER of my new favorite songs to sing and dance to in my kitchen… also by Jordan Feliz:

Zucchini “Chips”

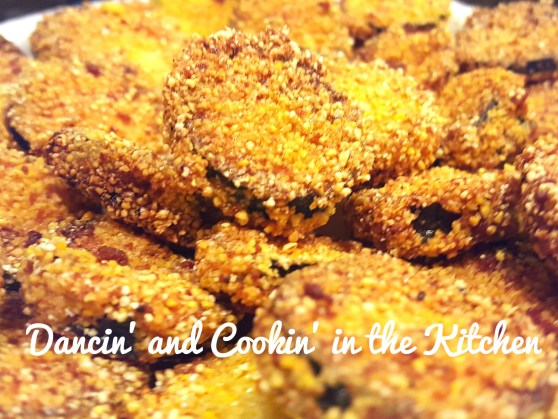
wp-1454463241495.jpg

So, I have a secret to admit. I LOVE watching the Bachelor. I know, I know… but, being that it’s been going for 20 years means that I’m obviously not alone!!! So, last night when I was going to watch it, I needed a snack. I’m trying to be gluten free as much as possible, and also trying to eat “clean”. So… I pulled out a couple of zucchini and made these! YUM!

2 things: mine came out a little bit too dark because I got distracted by my 4 yr old little boy who needed some juice… AND I should have ground my “polenta/corn grits” a bit more finely.

So, here’s the DELISH recipe:

Serves 2-4 as a snack or appetizer

INGREDIENTS:

  • 3 small zucchini
  • 1 egg
  • 1 tablespoon water
  • 1/3 cup Masa Harina OR ground corn polenta/grits
  • 1/4 cup powdered Parmesan cheese
  • olive oil, for frying
  • salt and pepper
  • garlic powder
  • ranch dressing, for serving


Now, you may ask, what is Masa Harina flour???? It is: Masa harina is a very finely ground corn flour made from corn that’s dried, cooked in water with slaked lime (which gives it distinctive flavor), ground, and dried again. I found this info here: Mara Harina Definition

DIRECTIONS:

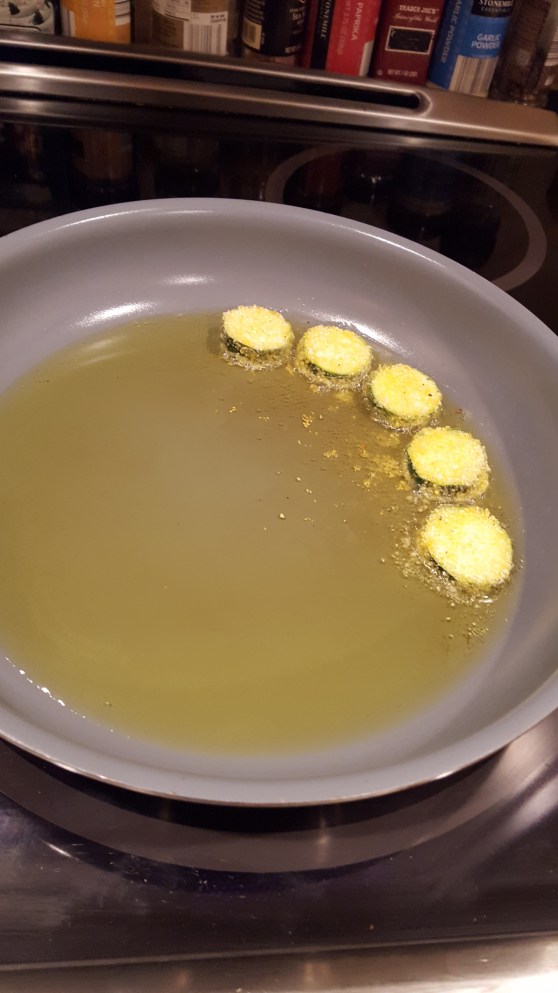
  1. Heat a 1/4 inch of olive oil in the bottom of a large skillet over medium heat.
  2. Wash and slice the zucchini into thin rounds, about 1/8-1/4 inch thick.
  3. Beat together the egg and water in a shallow bowl.
  4. Stir together the corn flour, parmesan cheese, salt and pepper and garlic powder, in a second shallow bowl.
  5. Coat the zucchini in the egg and then dredge in the corn flour mixture to coat.
  6. Add a single layer of zucchini to the hot oil, being careful not to crowd the pan. Fry for 1-2 minutes on each side, until golden brown. Repeat with remaining zucchini.
  7. Drain on a paper towel lined plate. Sprinkle with salt, if desired.
  8. Serve with ranch dressing for dipping.

**** don’t be like me and let them cook for too long… let them fry just until they are golden and then flip… watch the edges to know when they are ready and remove!! They are SOOOOOO good!!! Enjoy!

wp-1454463253822.jpg


And now, for the quote of the day: Instead of a quote, I’m going to post a song that my kids and I have been blasting and dancing to… in the kitchen!!

Dancing Through the Fire


Guess I took a break!

So, for me, when blogging gets to be a little “overwhelming” I take a break. I don’t stop cooking, I just stop writing about it.

The bad thing is, I continue to make up new recipes and try new things on a weekly basis… and then my husband asks if I “blogged” it, or at least wrote it down because he wants it again… I say “no, sorry!”. Sadly, it’s when I’ve “winged” something and cannot remember the exact measurements and will have a very hard time replicating it because I didn’t pay attention when I was making it.

One of those things was this chili. I did re-make it (because he said it was his favorite chili that I’ve EVER made!!!) And so, I figured out how I did it, re-made it, and it’s a winner!!!!

Since he loved it so much, it inspired me to get back into WRITING down what I’m cooking if it’s not a repeat. I also am going to document it here. Not just for the few followers, but for myself! I may also turn this blog into a cookbook, even if it only sits on my family’s shelves.

So, here’s my chili recipe:


Husband’s Favorite Recipe:

Ingredients:

1 lb. ground beef
1 tsp minced garlic
1/2 small yellow onion diced (freeze the remaining onion for later!)
1 cup crushed tomatoes (I have yet to find a can of crushed tomatoes in an 8 0z. size, so save the rest of it for later, or make a double batch!)
1 – 1 1/2 TB chili powder
1 tsp ground cumin
1 tsp dried oregano
1/4 tsp garlic powder
1/4 tsp onion powder
1/2 tsp salt (or to taste)
dash cayenne pepper (I go light on this, to turn up the spice, add more!)
2 TB Masa Flour (Corn flour). You can also just grind Corn Grits (or polenta) into a flour consistency with a blender or magic bullet!
1 can black beans
1 cup frozen corn
1/2 bottle of beer (I use whatever my husband has in the fridge… it varies!)


(I currently do not have any pictures of this chili…. boo! I’ll have to make this again, and post pictures when I do!)

Place the ground beef in a large pot and throw in the garlic and onions. Cook the meat and “chop” with spatula to get the meat into nice small pieces as it’s cooked. Cook until browned and cooked through. Drain off the excess fat, and then pour in the crushed tomatoes, chili powder, cumin, oregano, onion powder, garlic powder, salt and cayenne. Stir together well, cover, and then reduce the heat to medium to medium low. Simmer for 15-20 minutes stirring occasionally. Add the 1/2 bottle of beer (about 1 cup). If the mixture becomes overly dry, add 1/2 cup water at a time as needed.

A few minutes before you want to serve the chili, place the masa harina (or your ground corn meal) in a small bowl. Add 1/4 cup water and stir together with a fork. Dump the masa mixture into the chili. Stir together well, and then taste and adjust the seasonings. Add more masa paste and /or water to get the chili to your preferred consistency, or to add more corn flavor. Add the beans and the frozen corn and simmer for 10 minutes. Serve with shredded Cheddar, sour cream (or PLAIN greek yogurt) and some fritos!!! You could even top it with some jalapeno slices!!!


And that’s it! It’s a basic recipe, but it’s a winner! You don’t need to make it too fancy to make it DELICIOUS!! You will LOVE this recipe! I’m pretty sure it’s going to be the only chili recipe made in this house for a while! 🙂