Kids Smoothie: Get some fruits and veggies in those picky eaters!!!

So, sadly, I have picky eaters. I don’t know how. I know the technical answer is me…. but I don’t know where it started. When my oldest started eating table food, she would eat ANYTHING and EVERYTHING I put in front of her. Her first Thanksgiving? Literally ate and LOVED everything at the table. Meats, veggies, fruits, and everything in between, she’d eat and love it all. Now? She hates chicken, and most other meat unless it’s in a taco or a VERY thin hamburger. She gags on certain foods I “force” her to try (our kids have to take a no thank you serving of each food prepared). She gagged on this one dish I made, and she LOVES each of the items in the dish individually, but I guess it’s GROSS when you mix them together?!

My son is a whole other story. When he was about 2 1/2 months old, he had a persistent full body rash. I was nursing him and was advised to cut certain things out of my diet. Well, that worked! We found out he has a LOT of food allergies. Some so serious that we have to carry epi-pens every where we go. We have come close to using them on 2 separate occasions, but we are blessed that we haven’t had to so far. When you have a child with VERY severe food allergies, you become hyper vigilant. If there’s even a POSSIBILITY of cross-contamination with that allergen, you don’t chance it. It’s not because you’re crazy, it’s because your child could literally die or end up in the hospital. It’s just not worth it. So, because of that, he does not have a very big list of foods he can eat, much less like. When I get creative in the kitchen and figure out a new dish that he can eat, it takes MANY tries, and little samples before he will start to eat more than 1 lick of it. Currently his list of foods include: Perdue Simply Chicken Nuggets, ONLY the chunks that are LIGHTLY breaded, and they MUST be crunchy, otherwise they are “yucky” and will be thrown to the dog. 2: Hummus. Oh, he ADORES hummus. He can eat about 1/2 cup of it for a snack! I like to stir in some flax meal for a bit of extra protein and omega-3’s. He’ll eat it with his favorite veggies straws, pretzels, tortilla chips, crackers.. heck, he’ll even eat it with his fingers! 3: Mommy’s homemade meatballs. Now, I am being specific here. He USED to also like the ones at Jason’s Deli (he can actually eat them!), but he’s changed his mind. Now they are gross. Also, if he eats mommy’s meatballs too many days in a row, they also become gross. 4: Cereal. He especially loves cheerios, but he really loves cereal with milk. 4: toast with bacon. This is the staple of our mornings. If we do not have Trader Joe’s organic oatmeal bread… it’s a horrible tragedy. It’s a REQUIREMENT for our mornings. We also have TJ no nitrites or nitrates added (these 2 ingredients give him hives… lovely right?) pre-cooked bacon. EVERY SINGLE MORNING. When we went to Disney, we did not get a meal plan with breakfast. It wasn’t needed, I knew all they’d want was toast and bacon. Even if pancakes and waffles were an option, NOPE, just toast and bacon. 5: Sunflower seed butter and Jelly sandwich. A friend of mine clued me in on this wonderful thing called Sunflower Seed butter. It’s literally the only “nut/seed” butter that my son can have, and he really loves it! Thank goodness! I buy mine at Publix or Trader Joes, and it’s a great alternative to PB that we can keep in the house. Of course it does have to go on a very lightly toasted bread. If it is too toasted, it does not taste good as a sandwich, it is toast, and shouldn’t have sunflower seed butter on it. If it isn’t toasted enough it sticks to the roof of his mouth and is also declared “yucky”. 6: Mommy’s baked goods. Mommy  knows these are safe, and tries to make some frequently. Especially banana bread and pumpkin bread. FAVORITES! 7: Waffles. Yup, Trader Joes has some that are acceptable, otherwise Mommy has a great batter that’s safe. 8: We’re working on others. Not a large list, but I’m really trying to get him to try new things. We’re working on daddy’s favorite, tacos, but…. we’re only to 3 small bites and then a “All Done”. So… we’ll get there.

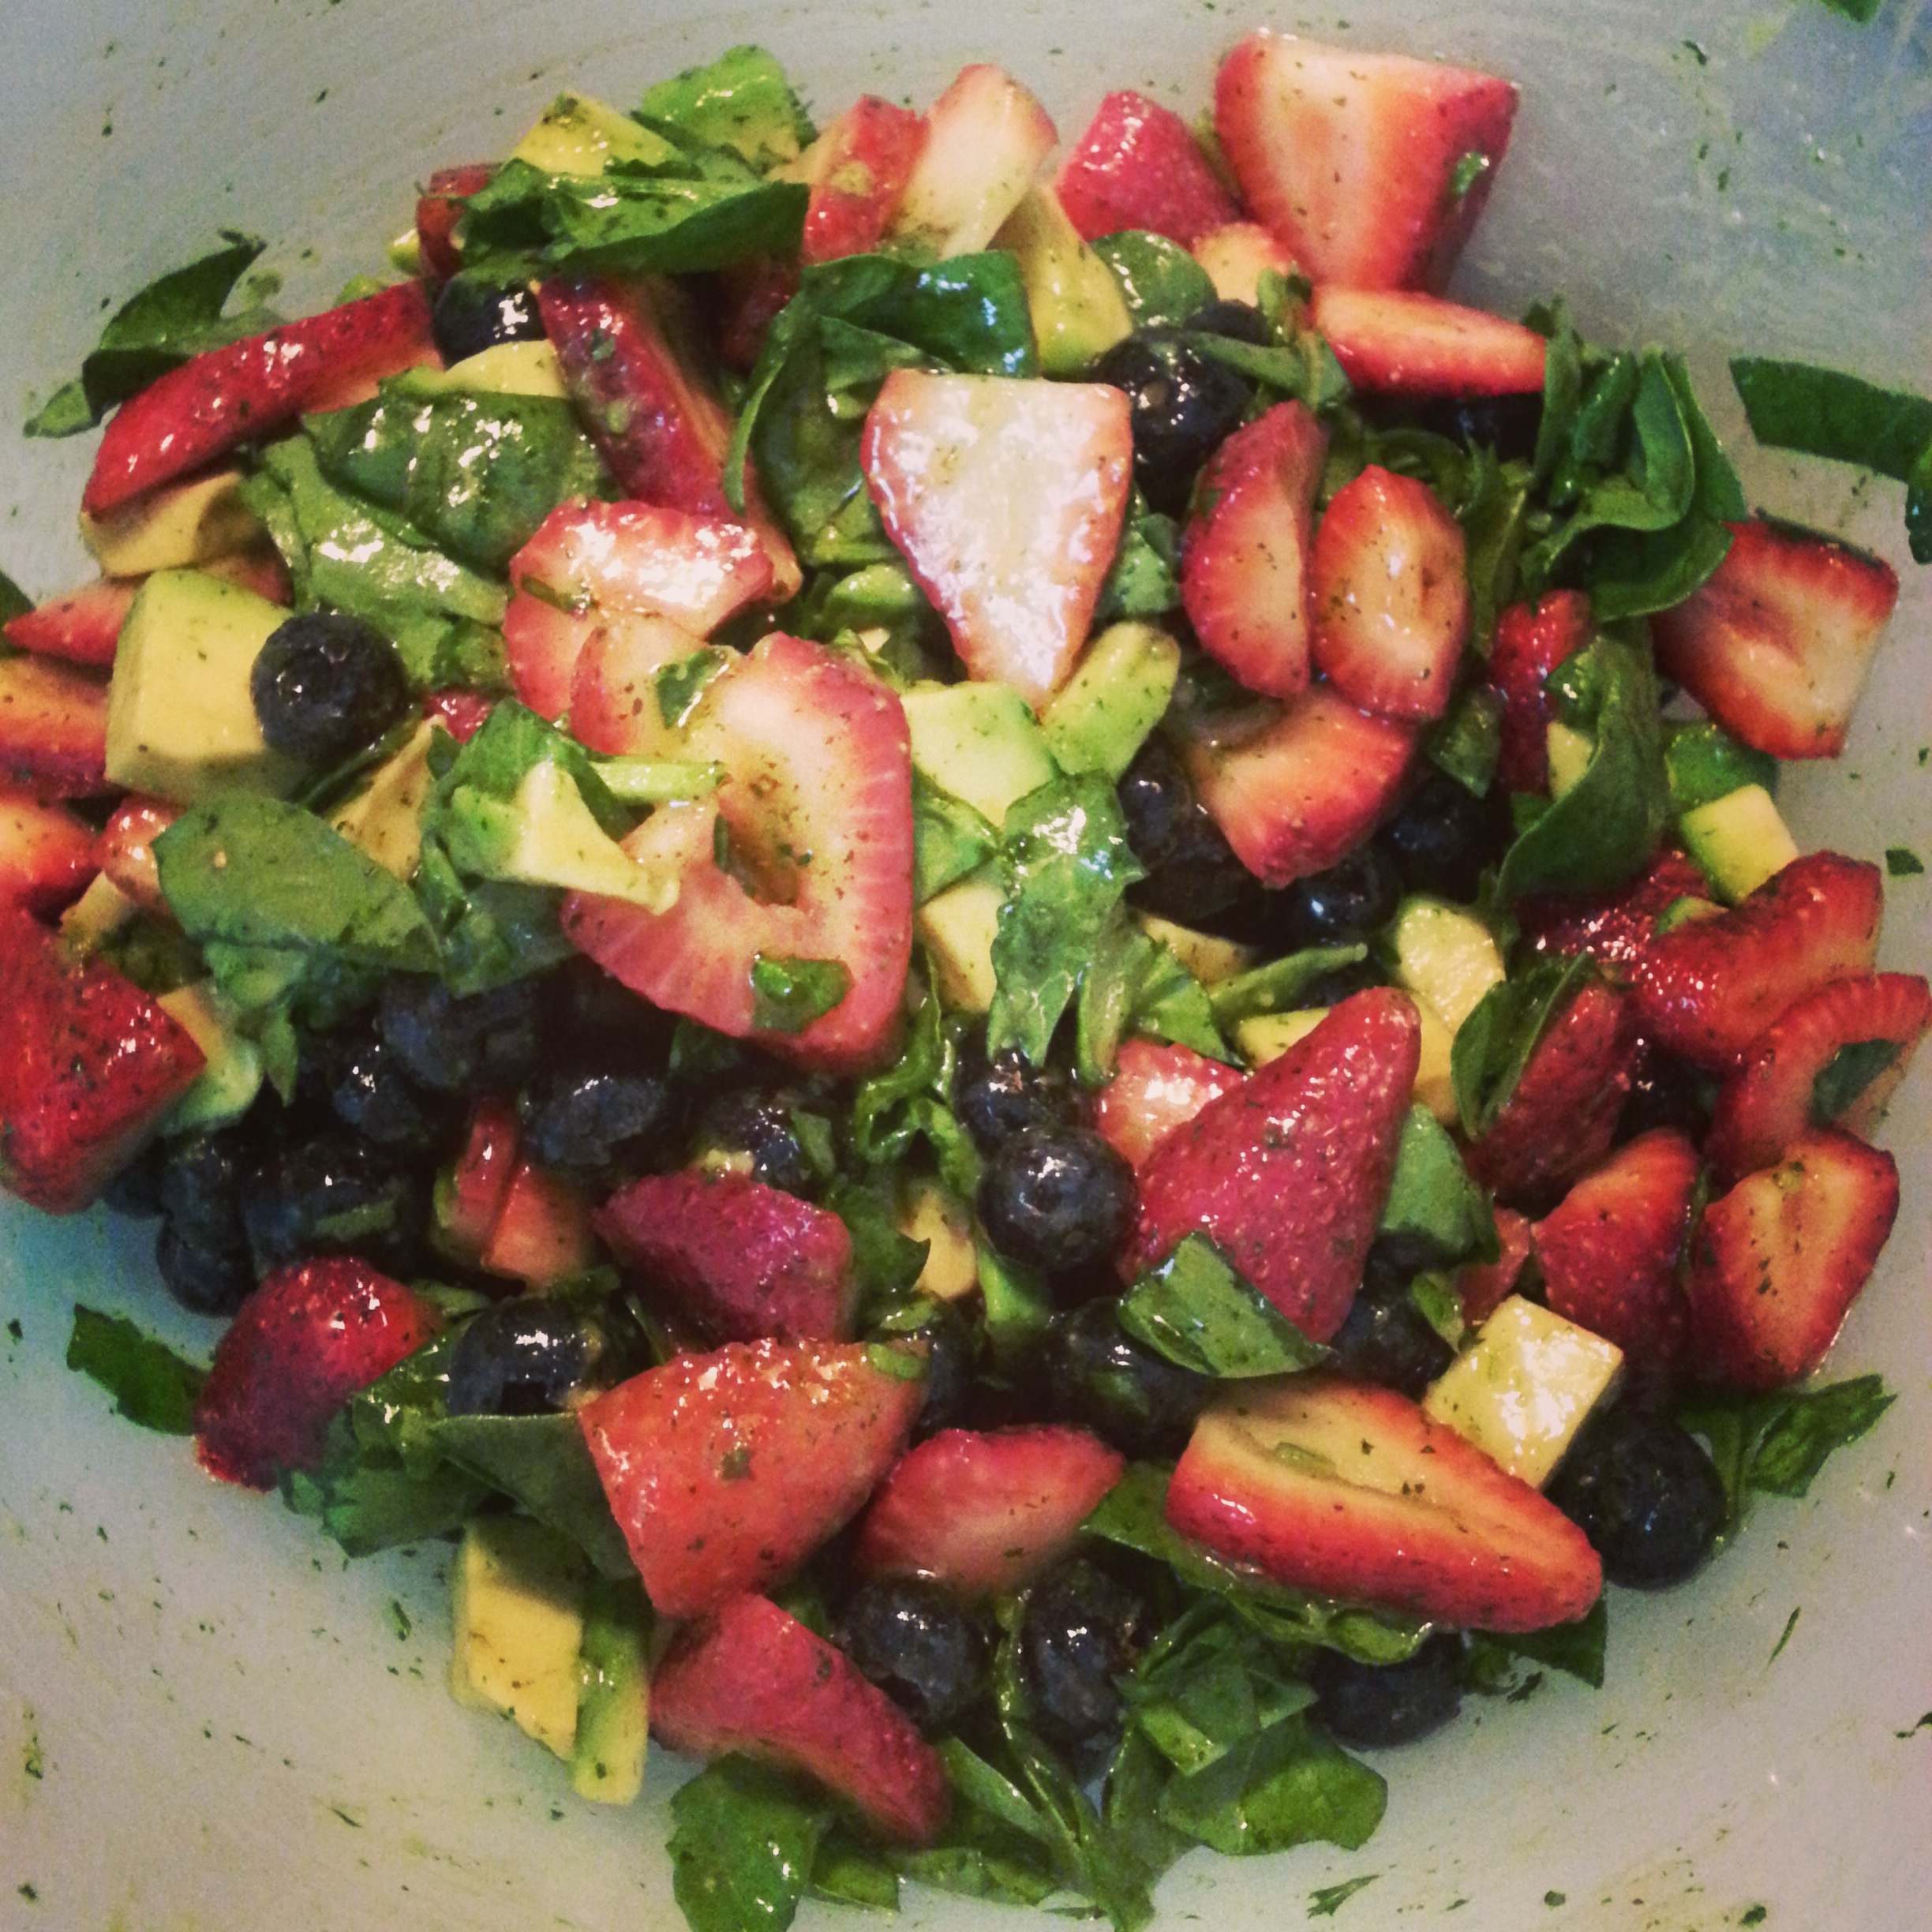
Because of these 2 paragraphs, I have to try really hard to get veggies and fruits in them. It’s insane. I can get them to each take their no thank you bites of their fruits and veggies, and eat their vitamins and probiotics… but I know they need MORE. So, I try to make a smoothie for them! They’ve had one that they really like the past 2 days, so here’s the recipe:

1 ripe banana (mine was frozen. When mine get over ripe, I peel them and place them in a baggie in my freezer for banana bread or smoothies.)
1/4 avocado – also frozen- leftover avocado sliced and frozen for smoothies
10 leaves baby spinach
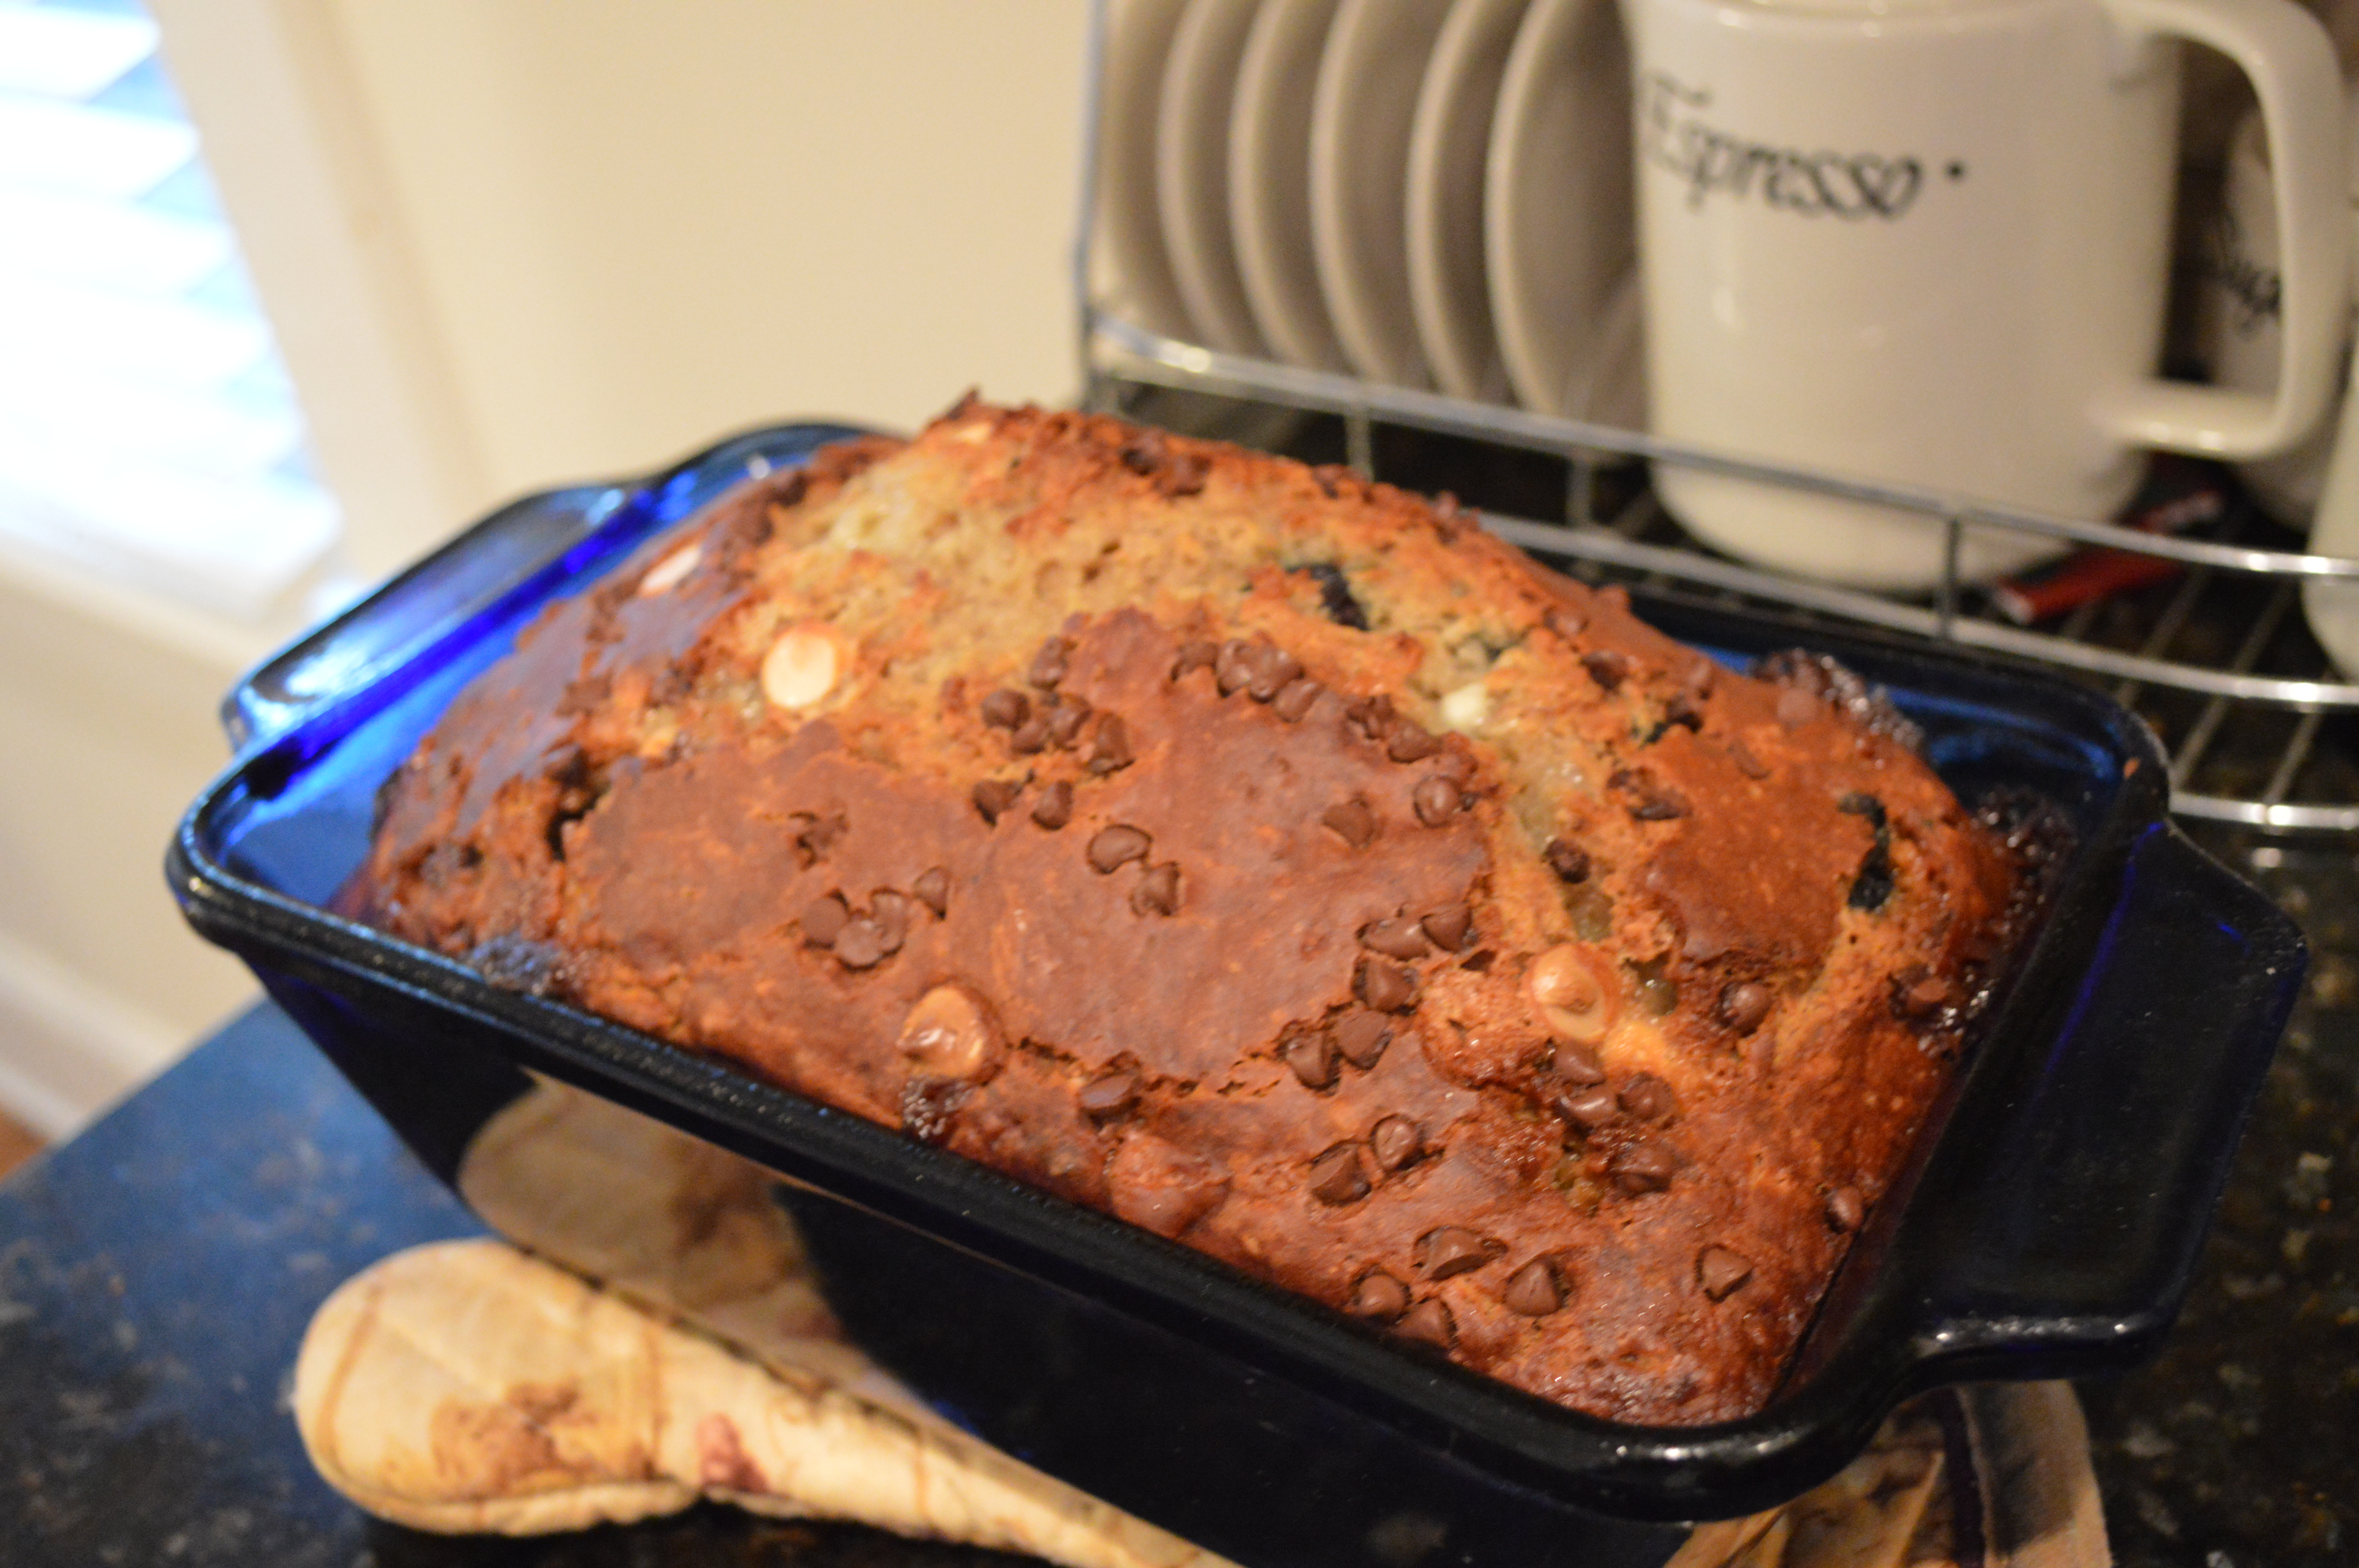
1/4 apple cored with PEEL ON
1/4 cup unsweetened applesauce
1/4 cup sorbet of your choice (I used raspberry)
2 baby carrots
1/2 cup water added (or apple juice, up to you)

I blend mine in my Nutri-bullet because it gets really smooth. You don’t want it chunky for your little ones… they won’t like the texture. But when I make this… they LOVE it! They each drank everything I gave them along with their dinner!

kidssmoothie
T
he kids with their smoothies 🙂 (Yes, that is a helmet on the table outside the window! lol) And my son is wearing a fake fur hat… it’s adorable!

And now, for the quote of the day:

c4f1309451aab1d30a0175a8dc831a77

New Year, New You… or Me?

Ok… so it’s been a while. Gotta be honest, we’ve had a LOT going on in our home! I am still cooking, almost every night. I just can’t always find the time to write down every ingredient amount and the recipe while I cook, and then take pictures. Horrible, right?! I’m a food blogger! I LOVE to cook! Sometimes when I just feel down… I just want to cook. I go to my mom’s house, I want to cook… I go visit my sister, I want to cook… it’s bad! HA!

Any way… my family went to Disney for a week… with a meal plan… and then came Christmas and New Years. Let’s just say I gained a bit of weight. Yeah.

So… back to the normal… home cooked, healthy meals for me!

I’ve been up at my sister’s house and reading a lot of Dietitian Cassie and getting some GREAT ideas! I can’t cut out all carbs/bread… but I like how she talks about food!!!!

Here’s her pinterest boards: http://www.pinterest.com/dietitiancassie/

Here’s her website: http://www.dietitiancassie.com/

So, my sister and I did our blogilates: http://www.blogilates.com/

and then we decided we needed a night time snack…so we checked out Dietitian Cassie’s suggestions under pinterest and found something DELICIOUS!

I had to change a few things because she recommended Almond Butter and due to a food allergy in my home, we only had sunflower seed butter… but man… what an awesome nighttime snack!

Here ya go!

20150101_212055

This is called Apple Nachos.

Now, I didn’t follow the original recipe completely… so this is my adapted version.

The original version is here: http://letthemeatclean.blogspot.com/2014/02/apple-nachos.html

Apple Nachos

2 large Fuji Apples
1/4 cup Sunflower Seed Butter
1/4 cup Milk Chocolate Chips (or semisweet)
2 pieces of caramel
3 TB Half&Half
1/4 cup Shredded raw coconut
Nuts of your choice (I did not put nuts on mine)
Slice apples and place on a plate or tray. Place sunflower seed butter, chocolate chips, caramel and half&half in a glass bowl in the microwave. Microwave for 30 seconds at a time and stir. When smooth, remove from microwave and drizzle over sliced and plated apples. Then, sprinkle coconut
and nuts on top.

DELICIOUS and filling!

20150101_212047

Brussel Sprout and Quinoa Salad with Butternut Squash

20141024_182614

Ok… this was a HIT! I’m telling you, everyone LOVED it! Even people that don’t love brussel sprouts. YUM! Even leftovers were yummy when put into the skillet to be heated up. YUM YUM YUM!!!!

I got the recipe from here: http://iowagirleats.com/2013/11/18/quinoa-with-caramelized-butternut-squash-and-roasted-brussels-sprouts/ 

I actually did NOT change anything!! Woah! Right?! HA!

Oh… except for the fact that I cook my quinoa in my rice cooker…. that’s it… I think 🙂

I took a bit of a hiatus from my food blog. Homeschooling started with my kindergartner, I have a 3 year old now… and WOAH, that’s a phase in and of itself! WHAT?! It’s been pretty crazy… so I put the extra things I was doing to the side for a short time to take a bit of a breather and focus on the crazy kids. 🙂

But… now that Thanksgiving is approaching and I’ll be trying some of my recipes out, I HAD to post them. Both for people who would read it but also for myself in the future so I could remember the recipes that I loved!

So, here’s the recipe.

20141024_182608

Ingredients:
1 cup quinoa, rinsed well
2 cups vegetable or chicken broth
9oz shaved brussels sprouts (I just got 9oz. from produce section, and then chopped them)
1 Tablespoon extra virgin olive oil
garlic salt & pepper
2 Tablespoons butter
2 cups 1/2″ cubed butternut squash
1-1/2 Tablespoons brown sugar
1/3 cup grated parmesan cheese
1/4 cup pepitas

Directions: 

  1. Bring chicken broth to a boil in a saucepan then add rinsed quinoa (be sure to rinse well in fine mesh sieve under cold running water – even quinoa that comes “pre-rinsed”.)  Place a lid on top then turn heat down to medium-low and simmer until tender, about 15 minutes. Fluff with a fork then set aside.
  2. Meanwhile, preheat oven to 375 degrees then line a baking sheet with foil. Add brussels sprouts, oil, garlic salt, and pepper to baking sheet then toss with fingers to evenly coat. Roast for 15 minutes or until golden brown.
  3. Melt butter in a large cast iron or heavy-bottomed skillet over medium-high heat. Add brown sugar and butternut squash then saute, stirring every so often – more so near the end – until tender, about 15 minutes.
  4. Combine quinoa, brussels sprouts, butternut squash, parmesan cheese, and pepitas in a large bowl then toss and serve with extra parmesan cheese, if desired.

**** If you have a rice cooker, it makes the quinoa SO much easier to cook!!! Try it! ******

Tips and Tricks!

So, things have been crazy around here lately! It took me forever to get my meals planned, and actually get out to go grocery shopping! UGH! So, due to that, there has been a shortage of posts… oops! So, for this post I am going to explain different cooking terms, give definitions and a couple of kitchen “tips” to make foods turn out the way that you want them! Sound good?? Ok!

So, lets start out by defining cooking terms. This is something I have slowly learned through cooking shows… so, lets define!

To make it easy, I got it from here: http://www.goodhousekeeping.com/recipes/cooking-tips/dictionary-cooking-terms

When a recipe says to cook the pasta: Al dente: Pasta cooked until just firm. From the Italian “to the tooth.”

There are times when you are cooking meat, such as turkey, and you want it moist. People use the term Baste: To moisten food for added flavor and to prevent drying out while cooking. Basically taking the juiced from the pan and occasionally putting back over the meat.

When we say to “beat” an egg… this is what we mean: Beat: To stir rapidly to make a mixture smooth, using a whisk, spoon, or mixer.

When making pesto, to keep the pesto green, you can do this to the basil and spinach: Blanch: To cook briefly in boiling water to seal in flavor and color; usually used for vegetables or fruit, to prepare for freezing, and to ease skin removal.

Bouquet garni: A tied bundle of herbs, usually parsley, thyme, and bay leaves, that is added to flavor soups, stews, and sauces but removed before serving.

If you are one to sear your meat before cooking it in the crock pot,… you are actually braising!! Who knew right?! Braise: To cook first by browning, then gently simmering in a small amount of liquid over low heat in a covered pan until tender.

How do you broil?? In the OVEN! 🙂 Easy! Broil: To cook on a rack or spit under or over direct heat, usually in an oven.

What do I mean when to brown or sear? Brown: To cook over high heat, usually on top of the stove, to brown food.

Do you ever wonder what it means when something is blackened? Here ya go! Blackened: A popular Cajun cooking method in which seasoned fish or other foods are cooked over high heat in a super-heated heavy skillet until charred, resulting in a crisp, spicy crust. At home, this is best done outdoors because of the large amount of smoke produced.

This is something that I do not usually use, but it is popular because it has a long shelf life: Bouillon: A bouillon cube is a compressed cube of dehydrated beef, chicken, fish, or vegetable stock. Bouillon granules are small particles of the same substance, but they dissolve faster. Both can be reconstituted in hot liquid to substitute for stock or broth.

Caramelize: To heat sugar until it liquefies and becomes a syrup ranging in color from golden to dark brown. You can also do this with onions… with the same end results in color.

When baking, if the term “cut-in” is used, here is the definition: Cut in: To distribute a solid fat in flour using a cutting motion, with 2 knives used scissors-fashion or a pastry blender, until divided evenly into tiny pieces. Usually refers to making pastry.

Chefs use this term a lot.. and it adds a lot of flavor! Deglaze: To loosen brown bits from a pan by adding a liquid, then heating while stirring and scraping the pan.

When making fried food, this term is used a lot: Dredge: To cover or coat uncooked food, usually with a flour, cornmeal mixture or bread crumbs.

If I say use the chicken/turkey/beef drippings it means: Drippings: Juices and fats rendered by meat or poultry during cooking.

Ever wonder what starting your dish on fire is called??? (When it’s ON PURPOSE!!???) Flambé: To drizzle liquor over a food while it is cooking, then when the alcohol has warmed, ignite the food just before serving.

And… another baking term: Fold: To combine light ingredients such as whipped cream or beaten egg whites with a heavier mixture, using a gentle over-and-under motion, usually with a rubber spatula.

Poach: To cook a food by partially or completely submerging it in a simmering liquid.

Reconstitute: To bring a concentrated or condensed food, such as frozen fruit juice, to its original strength by adding water.

Reduce: To decrease the volume of a liquid by boiling it rapidly to cause evaporation. As the liquid evaporates, it thickens and intensifies in flavor. The resulting richly flavored liquid, called a reduction, can be used as a sauce or as the base of a sauce. When reducing liquids, use the pan size specified in the recipe, as the surface area of the pan affects how quickly the liquid will evaporate.

Saute: From the French word sauter, meaning “to jump.” Sauteed food is cooked and stirred in a small amount of fat over fairly high heat in an open, shallow pan. Food cut into uniform size sautes the best.

Those are just a few terms. If you have another one that you’d like me to define and give an example of, please let me know!!!

Ok, now tips:

Shrimp: I have found that the best way to get the BEST tasting shrimp is to bake it. It just always comes out evenly and perfectly cooked for me. I start out with thawed UNCOOKED shrimp, peeled and deveined. Wonder how to do it on your own? http://www.simplyrecipes.com/recipes/how_to_peel_and_devein_shrimp/

I always use Ina Garten’s recipe for shrimp. She is the one I followed to get the perfectly cooked shrimp. I sometimes adjust it a bit, but I always use the temperature she says, and I adjust the time based on how large the shrimp are. I’m not the only one either! Other blogs follow her great ways too! http://www.thekitchn.com/tip-from-ina-garten-try-ovenro-115973

Here is Ina Garten’s original recipe showing it: http://www.foodnetwork.com/recipes/ina-garten/lemon-pasta-with-roasted-shrimp-recipe.html

Steak/Meat:

I have found, after trial and error, that my steak always turns out best when I start out by searing it on the stove (or browning) and then finishing it in the pre-heated oven for a certain amount of time until it reaches my desired temperature. Always. If I try to make it on the stove top only, it is usually either under done or over done. Just from my observations.

Mashed Potatoes:

Want them the most creamy? Add sour cream and whip them either in a stand mixer, or with a hand mixer. Seriously… whipped and delicious!

Veggies:

I have found that sauteing or roasting vegetables keeps more vitamins and color in vegetables (even from frozen) than boiling them. Try it!

Want me to post other tips or tricks?? Ask me!! Comment below and I’ll do my best to find them!

Stuffed Red Bell Peppers with Couscous and a Creamy Pesto Sauce

stuffedpeppers


So, it’s Friday night and the entire rest of my family is craving pizza… I, personally, am not. I know, I know… I’m a bit weird. You’re thinking “who wouldn’t want pizza on a Friday night?!”. Well… I guess me… I just needed something a bit more fresh and less greasy. SOOOO, stuffed peppers for ME!! 🙂 AND I got to make enough stuffing so that I can make myself more for lunch tomorrow! WOOHOO! And you know what? This was fresh and filling and not greasy. I don’t feel it in the pit of my stomach when I am done… THAT I like! So… try it out! 🙂

Stuffed Peppers:

Ingredients for the Filling


1 cup low-sodium chicken broth
2 teaspoons ground cumin
3/4 cup couscous
1 cup canned garbanzo beans, rinsed and drained
1/4 cup pancetta
1/2 packed cup chopped baby spinach leaves
1/2 cup shaved parmesan cheese (or asiago)
1/4 cup extra-virgin olive oil, plus more for drizzling
Kosher salt and freshly ground black pepper
2 medium red bell peppers (since I just made this for myself, I just used 1 red bell pepper… )
1 medium yellow bell pepper
1 medium orange bell pepper
1 large zucchini sliced and cut into bite size pieces
3 leaves of basil cut into thin strips
2 scallions cut into small pieces
Hot water, as needed

Sauce: (This is Giada’s recipe from here: Giada’s Stuffed Peppers) (I personally just used leftover pesto, added some mascarpone cheese, sugar, and some extra lemon zest and lemon juice… IF you have leftover pesto laying around you can use my version!)
1 packed cup fresh basil leaves
1/2 cup (about 4 ounces) creme fraiche
3 tablespoons extra-virgin olive oil
1 tablespoon water
1 garlic clove, coarsely chopped
2 teaspoons fresh lemon juice
1/4 teaspoon sugar
1/4 teaspoon salt, plus extra, as needed
1/4 teaspoon freshly ground black pepper, plus extra, as needed

stuffedpeppercouscous

Directions: 

Put an oven rack in the center of the oven. Preheat the oven to 400 degrees F.

Filling: In a medium saucepan, bring the chicken broth and cumin to a boil over medium-high heat. Remove the pan from the heat and stir in the couscous. Cover the pan until the couscous is tender and all of the liquid has been absorbed, about 5 to 6 minutes. Put the couscous in a large bowl and add the beans, scallions, spinach, parmesan and 1/4 cup olive oil. Season with salt and pepper, to taste. Then put the pancetta and the zucchini into a small skillet, sautee just until the zucchini starts to soften and then add into the same bowl as the rest of the ingredients. Stir until all the ingredients are combined.

Slice the tops off the peppers and remove all the ribs and seeds. If necessary, cut a very thin slice from the base to help the peppers stand up. Stuff the peppers with the filling and drizzle the tops with olive oil. Put the peppers in an 8 by 8-inch square baking dish. Fill the baking dish with 3/4-inch hot water and bake until the filling is golden and the peppers are cooked through, about 55 to 60 minutes. Cooks Note: If the filling begins to brown too quickly, cover the pan with foil.) (I cooked my 1 pepper for 30 minutes, which was plenty. I refrigerated the remaining filling for a later time!)

Sauce: In a blender, combine the basil, creme fraiche, olive oil, water, garlic, lemon juice, sugar, salt, and pepper. Blend until smooth. Adjust the seasoning with salt and pepper, to taste. (Or just blend together my version in a nutribullet)

Remove the peppers from the oven and arrange on serving plates. Spoon the sauce around the peppers and serve.

Enjoy!!!

And now, for the quote of the day:

7fb8a8e323ff0f4179d9291224fd5ca9

Stuffed Mini Sweet-Peppers

stuffedminipeppers

So, John again made a request… can you imagine what the “ethnicity” of the meal was?? That’s right! Mexican! He specifically requested Refried Black beans (Recipe :https://dancinandcookininthekitchen.com/2014/07/24/spicy-shrimp-tostado-with-refried-black-beans-and-guacamole/), white rice, red sauce (From enchiladas, recipe here: https://dancinandcookininthekitchen.com/2014/07/02/ground-beef-enchiladas/) and Stuffed mini peppers. So… I of course obliged!!! I started out with the homemade refried black beans, and got those cooking and simmering. Then I got the ground beef for the stuffed peppers going, then I started the rice in my rice cooker. Remaining directions for the Stuffed min sweet peppers below:

Stuffed Mini Sweet Peppers

Ingredients:
Vegetable oil cooking spray
2 tablespoons olive oil
3/4 lb ground beef
1/4 medium onion, finely chopped
3/4 FF cottage cheese (or ricotta cheese)
1/3 shredded cheese (I used cheddar)
dash of cayenne pepper
1/2 tsp minced garlic
1 tsp. chili powder
1 tsp. ground cumin
2 small jalapenos cut and diced (I kept the seeds in)
Kosher salt and freshly ground black pepper
20 (2 to 3-inch long) sweet baby peppers

stuffedminipeppersbefore

Place an oven rack in the center of the oven and preheat to 350 degrees F. Spray a baking sheet with vegetable oil cooking spray and set aside.

In a medium skillet, heat the oil over medium-high heat. Add the onion  and garlic and cook, stirring frequently. Cook until translucent and soft, about 5 minutes. Add ground beef  and jalapenos  and seasonings to the pan and cook through. Set aside to cool for 10 minutes.

In a medium bowl, combine the ground beef mixture, cheeses, salt and pepper to taste.

Using a paring knife, cut 1/2-inch from the stem-end of the peppers. Remove the seeds and veins. Using a small dessert spoon, fill each pepper with the beef and cheese mixture. Place the filled peppers on the prepared baking sheet and bake for 15 to 18 minutes until the peppers begin to soften. Remove from the oven and cool for 10 minutes.

Arrange the peppers on a platter and serve.

You  can pair these with refried beans and rice like I did, or with wings… or salad!! They got high reviews!!!!

And now, for the quote of the day:

tumblr_m6n3gh3ZES1rvjtt3o1_500

Hummus!!

No picture this time, BUT, at least there is a recipe! We LOVE hummus at our house, and we go through a lot! I try to get more protein in my little 5 year old who turns her nose up at most meats… and my 2 year old who likes something one day, and will spit it out and gag the next. SO FRUSTRATING! But, at the moment, hummus has been a hit! So, we’re going with it! I was completely out of hummus, but had a can of garbanzo beans and wanted to make some… so, I checked, and the only ingredient I didn’t have was Tahini… so I made it without. Pretty good! I would say it probably is a bit better with the Tahini (made from sesame seeds), but this was quite good! I even threw in some flaxseed meal to give my kids a bit extra protein. Whatever I can do!

Ingredients:

1 can of garbanzo beans
juice of 1 1/2 lemons
zest of 1 lemon
1/2 tsp minced garlic
1/8 cup (approx) of olive oil
1 tsp flaxseed meal


Directions:

For the most smooth results, you will want to rinse the canned garbanzo beans in a colander, and then peel. You do not HAVE to peel the garbanzo beans, it just results in a smoother hummus. In a food processor (or magic bullet) you put all of the ingredients and blend until smooth! Done!


Enjoy!

Lemon Zucchini Muffins with a Lemon Glaze

lemonzuchinnimuffins

These are DELICIOUS! They are so light and fluffy, and lemony! They taste like summer! And, you get to use up a zucchini that’s been sitting in your fridge for a little bit too long! YUM!

Ingredients:

  • 2 cups all purpose flour (then remove 2 TB and put back into bag of flour)
  • 2 Tb of corn starch ( to replace the 2 TB of flour you removed)
  • 1/2 tsp. salt
  • 2 tsp. baking powder
  • 2 eggs
  • 1/2 cup canola oil
  • 1 cups sugar
  • 2 TB lemon juice
  • 1/2 cup buttermilk (If you don’t have buttermilk, just add 1/2 TB of white vinegar to your milk and let sit for 2-3 min)
  • zest of 1 lemon
  • 1 cup zucchini grated (on the cheese grater)

Glaze Ingredients:

  • 1 cup powdered sugar
  • 2 TB lemon juice
  • 1 TB skim milk (or unsweetened coconut milk)

Directions:

  1. Mix flour, salt, corn starch and baking powder in a medium bowl and set aside.
  2. In a large bowl, beat eggs. Then add oil and sugar until well blended. Add lemon juice, buttermilk, lemon zest to this mixture and blend all together.
  3. Fold in zucchini until it is mixed well.
  4. Add dry mixture to the wet mixture and blend all together until well combined.
  5. Pour batter into greased muffin tin. It makes about 16 muffins.
  6. Bake at 350 for 12-15  minutes.
  7. While still warm, make glaze and spoon over the muffins and then sprinkle lemon zest over the top.

Blueberry Banana White Chocolate Bread

BlueberryBananaWhiteChocolateBread

This bread was AMAZING!!! Besides the fact that it smells like absolute HEAVEN when it’s baking… DELICIOUS… oh man… dessert, breakfast, mid-day snack… whatever. YUM! My family loves it, and I brought it as a snack to my friends… and they enjoyed it too!!! YUMMY!!!

Ingredients:

1/2 cup unsweetened organic applesauce
2 Tb butter at room temperature
1/2 cup sugar (or could use 1/2 cup honey)
2 cups all purpose flour
1/2 tsp sea  salt
3/4 tsp. baking soda
2 ripe bananas mashed
1 tsp. vanilla
2 eggs
1/3 cup organic low-fat PLAIN yogurt

1 cup white chocolate chips
1 cup blueberries (DRY, fresh. Then toss in 1 Tb of flour.) I used frozen, thawed and dried a bit on a paper towel and tossed in 1 Tb of flour.

DSC_0744

1. Preheat oven to 350°F. Spray a 9×5-inch loaf pan with cooking spray.
2. In a medium bowl, whisk together the flour, baking soda and salt.
3. In a separate large bowl, beat the sugar and butter and applesauce with an electric mixer at medium speed until well blended (about 1 minute). Add the eggs one at a time, beating well after each addition. Add the banana, yogurt, and vanilla; beat until blended. Stir in the flour mixture; just until moist. Don’t over-mix. Stir in the chocolate chunks and then gently stir in the blueberries. If you want, you can sprinkle a few additional chocolate chunks and blueberries on the top to make it look pretty.
4. Spoon the batter into the prepared pan. Bake for 50 to 60 minutes or until a wooden pick inserted in center comes out clean. Cool 15 minutes in the pan on a wire rack. Remove from pan and cool completely on the wire rack.

*This recipe turns out perfect for me, so here are the details: We bake at sea level in a greased glass blue pyrex pan and we bake on the middle rack in a electric oven.
*If you use frozen blueberries, dry off and toss in flour. Do not wash and then toss in, you want to DRY as much as possible so you don’t add too much moisture.
*If you bake in a dark metal pan or if you are baking at a different altitude or using an gas oven, you may possibly get different results.
*Oven temperatures can vary quite a bit, so if you have an oven thermometer that is helpful to see if yours is recording the right temperature.
*If the top is browning too quickly, cover the top with foil in the middle of baking to prevent it from browning further.

Bake, and ENJOY!!!


Quote of the Day:

4a7a70f2c18d8ef03fad2c7616ed5a63

Summer Fruit Salad with a Honey, Lime, Cilantro Dressing!

IMG_20140720_214032

Salad Ingredients:

-1 Avocado sliced and cut into 1-2 inch pieces
-about 15-20 strawberries washed and sliced
-3/4 of a pint of blueberries washed and tossed into bowl
-handfull of spinach chopped roughly


Dressing:

  • 1/4 cup cilantro
  • 3 tbsp. canola oil (or other light oil)
  • 2 large TB. honey
  • juice of 1/2 of a lime
  • dash of dried oregano
  • 1/4 tsp minced garlic
  • about 1/4 tsp Mrs. Dash or similar

Whir in a magic bullet, food processor or blender for about 10 seconds

Pour dressing over salad and toss. ENJOY!!!!!


aa35914ed817205ab92b7ade82244101